
Create DB table
Create tables ..
Workshop - Create DB tables
If you work with databases, one of the main objectives will be to extract, load and transform your data. Steel Wheels has several data sources that require loading into a database to discover, cleanse, conform, enrich and validate the data for reports.
In this guided Lab, you will:
Connect to a database
Create a database table
Configure: Table Input

The following content has been automatically generated by an AI system and should be used for informational purposes only. We cannot guarantee the accuracy, completeness, or timeliness of the information provided.
Any actions taken based on this content are at your own risk. We recommend seeking qualified expertise or conducting further research to validate and supplement the information provided.
Create a new Transformation
Any one of these actions opens a new Transformation tab for you to begin designing your transformation.
By clicking File > New > Transformation
By using the CTRL-N hot key

Follow the steps outlined below:
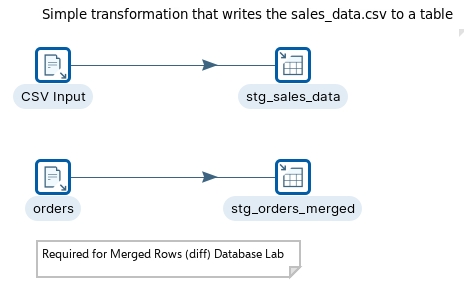
CSV File input
This step provides the ability to read data from a delimited file. The CSV label for this step is a misnomer because you can define whatever separator you want to use, such as pipes, tabs, and semicolons; you are not constrained to using commas. Internal processing allows this step to process data quickly. Options for this step are a subset of the Text File Input step.
This step has fewer overall options than the general Text File Input step, but it has a few advantages over it: NIO
Native system calls for reading the file means faster performance, but it is limited to only local files currently. No VFS support.
Parallel running
If you configure this step to run in multiple copies or in clustered mode, and you enable parallel running, each copy will read a separate block of a single file allowing you to distribute the file reading to several threads or even several slave nodes in a clustered transformation.
Lazy conversion
If you will be reading many fields from the file and many of those fields will not be manipulate, but merely passed through the transformation to land in some other text file or a database, lazy conversion can prevent Kettle from performing unnecessary work on those fields such as converting them into objects such as strings, dates, or numbers.
Start Pentaho Data Integration.
Drag the CSV file input step onto the canvas.
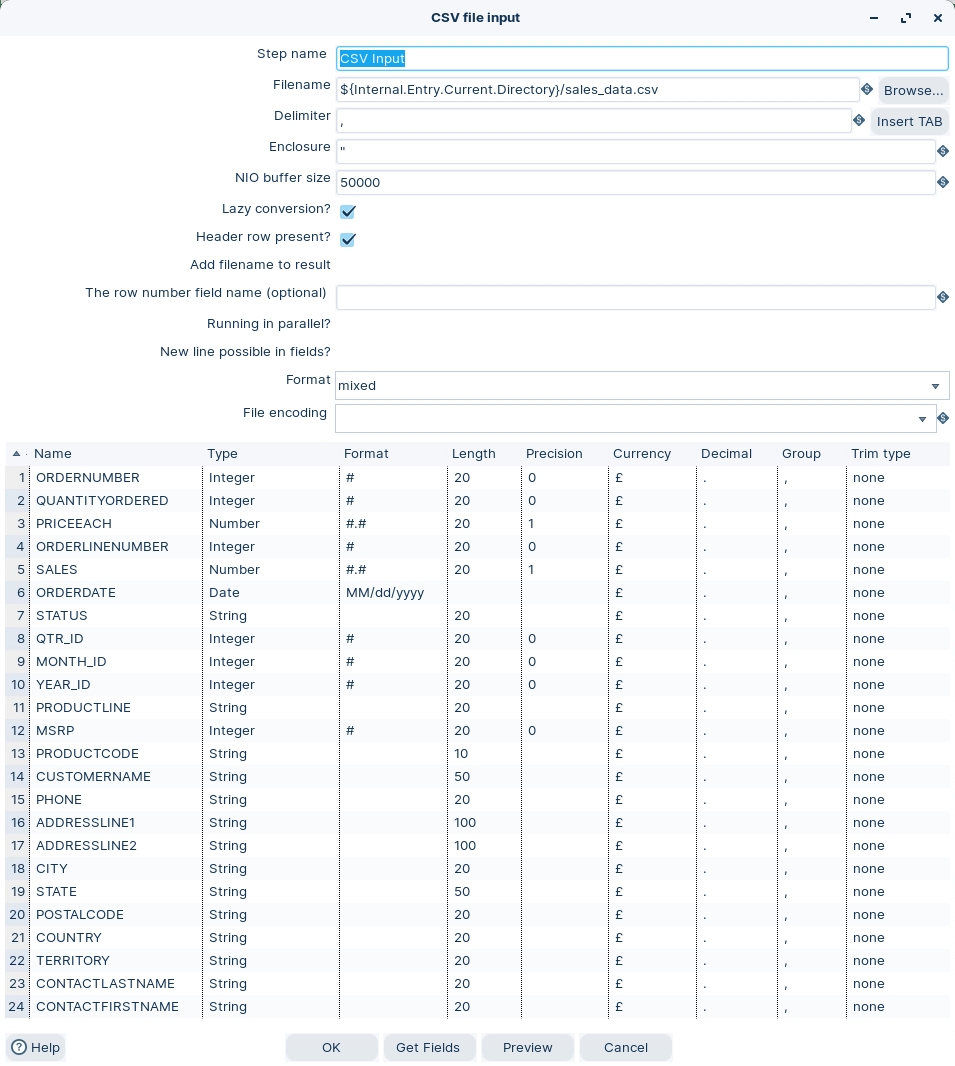
Open the CSV file input properties dialog box.
Stepname
csvi-sales_data
Filename
${Internal.Entry.Current.Directory}\sales_data.csv
Delimiter
, (comma)
Lazy Conversion
unchecked
Header row present
checked
The CSV File input parses a sample number of records to set the metadata properties. As the Varchar is being mapped to a database table then you need to be careful to avoid truncation.
Ensure the following details are configured, as outlined below:
Click on the Get Fields button.
Click OK.


Last updated